TIME-LAPSE TOURS
OVERVIEW
HDOnTap’s proprietary Time-Lapse Service allows you to take greater control of your cameras automated PTZ tours, including adjusting the order of presets and speed. When enabled, tours will automatically move your camera as well as generate time-lapse clips according to your specifications.
PREREQUISITES
- You must have your Time-Lapse login.
Contact your Customer Administrator or HDOnTap Support if you need assistance with your Time-Lapse credentials. - Your camera must be configured in the Time-Lapse system, including preset settings for PTZ cameras.
STEP-BY-STEP INSTRUCTION
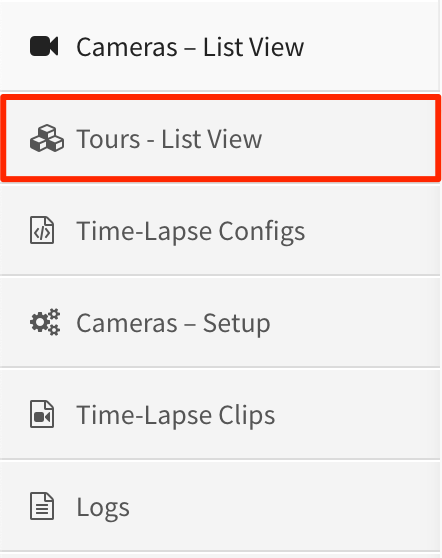
1. Log into the HDOnTap Time-Lapse Portal and navigate to the Time-Lapse Service > Tours – List View:


2. CREATING A TOUR
Navigate to Tours – List View in the left side navigation menu, then select your camera from the Choose Camera drop-down.

Click the + Add Tour button.
Select the desired Tour Settings and click Save when finished.
PTZ Tours:
Fixed Tours:
Tour Name
Click the edit icon to set the tour name.
Presets
Choose the desired order of preset positions
Note: This field will be unavailable for fixed cameras.
Days
Choose the day(s) when you would like the tour to operate.
Tour Start/End Time
Choose the time of day (local to the camera) that the Time-Lapse Portal will start and finish running the tour.
Note: The start and end times must be in the same 24-hour day.
Image Grab Delay
Set the number of seconds from the time the camera reaches the preset to the time that an image is grabbed from the camera. We recommend between 4 and 8 seconds, which allows the camera to settle on the preset and focus before grabbing an image.
Note: This field will be unavailable for fixed cameras.
Fetch Interval
The number of seconds between each image grab and save.
Note: This field will be unavailable for PTZ cameras.
After saving, the tour will be disabled. Click Enable if you would like the tour to be operational.
If the current day and time is within the tours operating period, the tour will display as Active. Otherwise, the tour will display as Standby.
![]()

3.ENABLING/DISABLING A TOUR
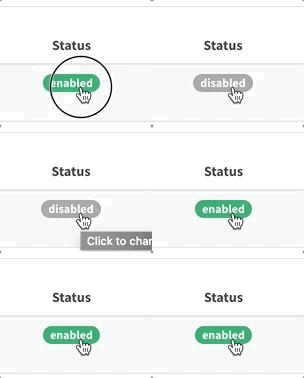
The status indicator in the status column will indicate whether your tour is active or disabled:

Active indicates that your tour is currently active, and your camera will be in motion.
Standby indicates that the current time is outside of your tour’s hours of operation, and your camera will not be in motion.
Disabled indicates that your tour is currently disabled, and your camera will not be in motion.
Enabled indicates that your tour is is being reactivated after being disabled, and your camera will be in motion shortly.To change the status of the tour, click on the status indicator:

4. EDITING OR DELETING A TOUR
Click on the tour name:

To edit, make whatever adjustments you wish. Your edits will be saved automatically.
To delete, click on the X in the upper right corner:

