
Recordings System - How To USe Guide
Introduction
Thank you for being an HDOnTap client. We appreciate the opportunity to support your live streaming needs and are committed to providing you with powerful, easy-to-use tools to manage and record your streams with confidence.
This guide walks you through the HDOnTap Live Stream Recording Interface — from logging in and selecting a stream to starting recordings, managing segments, adjusting settings, reviewing logs, and using bulk actions. Whether you are monitoring wildlife, scenic views, or event coverage, this interface provides reliable recording and playback capabilities at your fingertips.
Accessing the Recording System
To manage your live stream recordings, log in using your HDOnTap portal credentials.
You can access the system by:
• Clicking Recordings from the HDOnTap portal dashboard
• Navigating directly to: clips.hdontap.com
You will see a login form prompting for your credentials.

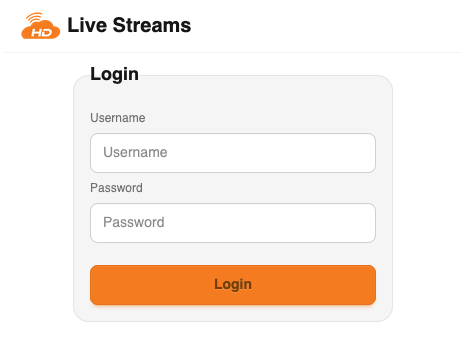
Enter Your Credentials
Username
Enter your assigned username.
Password
Enter your secure password.
Note
Login credentials are provided by HDOnTap support when you become a customer. If you have forgotten your credentials, please contact support.
After entering your credentials, click the orange Login button.
You will be redirected to the Live Streams dashboard.
Navigating the Stream List Interface
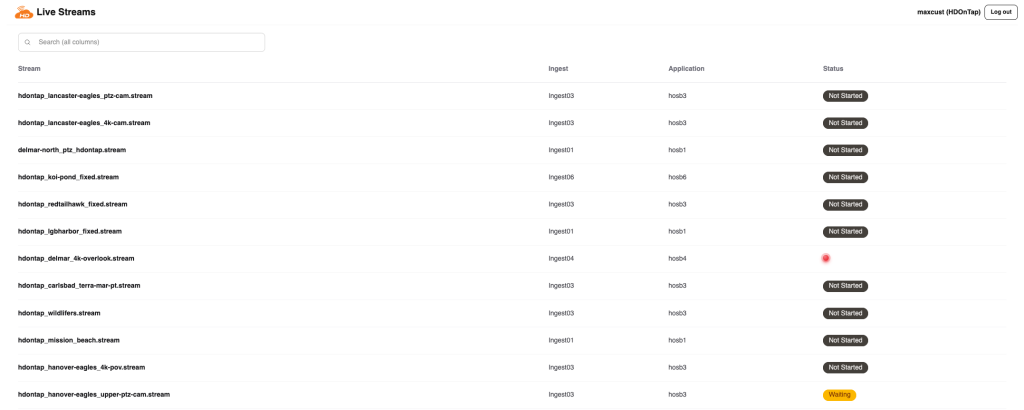
After logging in, you will see the Live Streams Dashboard, which lists all active and available streams. This dashboard is your control center for managing recordings.
Using the Dashboard
Search Bar
Use the search field to quickly filter streams by keyword.
Stream Selection
Click a stream name to open its Recording Control Interface.
Stream List Overview
Each row represents a stream and includes: Stream, Ingest, Application, and Status:
• Not Started — Recording has not begun
• Waiting — Stream is pending activation
• Red dot — Recording is currently active
Stream Recording Control Interface
When you select a stream, you enter the Recording Control Interface.
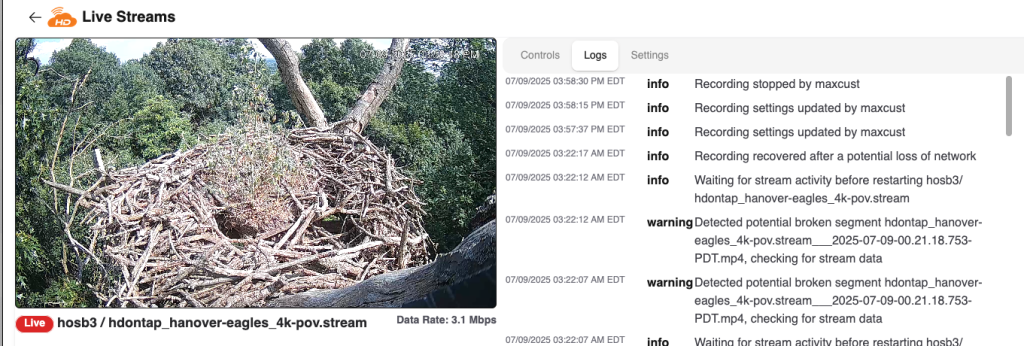
Live Video and Stream Information
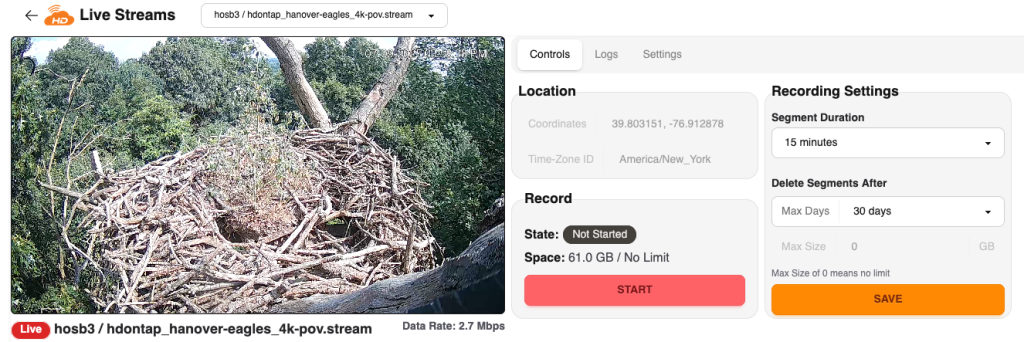
At the top of the page:
• Live preview of the stream
• Stream name and server path
• Live indicator
• Current data rate
Controls Panel
The right panel includes three tabs: Controls, Logs, Settings
Under Controls:
Location: Displays camera coordinates and time zone.
Record Section
State — Recording or Not Started
Space — Storage usage
Start or Stop button
Location and GPS Coordinates
The Coordinates field plays an important role in correctly assigning the time zone for your recordings.
The system uses GPS coordinates to determine the appropriate time zone for the stream. This ensures that all recorded segments display accurate start times based on the physical location of the camera.
Where Coordinates Come From
If your stream is associated with a camera device inside the HDOnTap Portal, the coordinates are automatically pulled from that device entry.
You can manage camera devices in the HDOnTap Portal here:
https://portal.hdontap.com/#/devices
Each device entry in the portal includes GPS latitude and longitude values. These coordinates determine the stream’s Time Zone ID automatically.
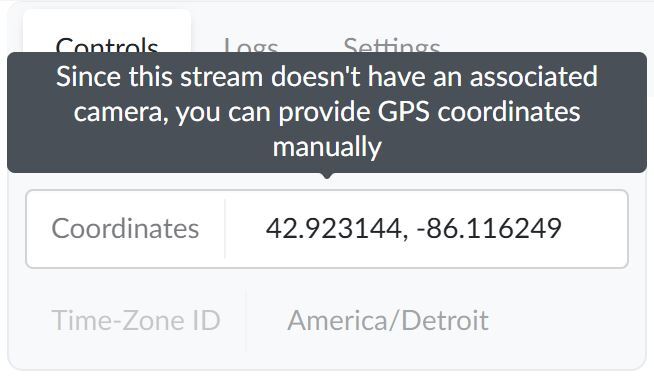
Streams Without a Camera Entry
If your stream does not have an associated camera device entry in the portal, you may manually provide GPS coordinates in the Recording Control Interface.
When coordinates are entered manually:
• The system uses them to determine the correct time zone
• The Time Zone ID field updates accordingly
• Recording timestamps will reflect the correct local time
This ensures accurate logging, segment labeling, and playback reference. If you need GPS Coordinates for your camera’s location use a web based mapping service like google maps.
Starting a Recording
When recording is idle:
State: Not Started
Button: START
Space: Current storage usage
Click START to begin recording.
Stopping a Recording
Click STOP to end recording.
This finalizes the current segment.
Stopping does not delete previous recordings.
Recording Settings
Segment Duration
Defines the length of each recording file (example: 15 minutes).
Delete Segments After
Max Days — Deletes recordings older than selected days
Max Size (GB) — Deletes oldest recordings when storage limit is reached
A value of 0 means unlimited.
Editing Settings
Recording settings are locked while recording is active.
To modify settings:
Stop recording
Adjust settings
Click Save
Restart recording
Best Practice: Segment Duration
If your stream experiences intermittent network disruptions, use a shorter segment duration such as 5 minutes.
Network interruptions can corrupt the segment currently being recorded. If your camera goes offline mid-recording the corrupted recording will be automatically deleted and the recording system will await reconnection to begin recording. Shorter durations reduce data loss and isolate potential corruption to smaller files.
Viewing Stream Activity: Logs Tab
The Logs tab shows a chronological record of:
• Recording start and stop events
• Settings updates
• Network interruptions
• Warning messages
If you frequently see warnings about broken segments, consider reducing your segment duration.
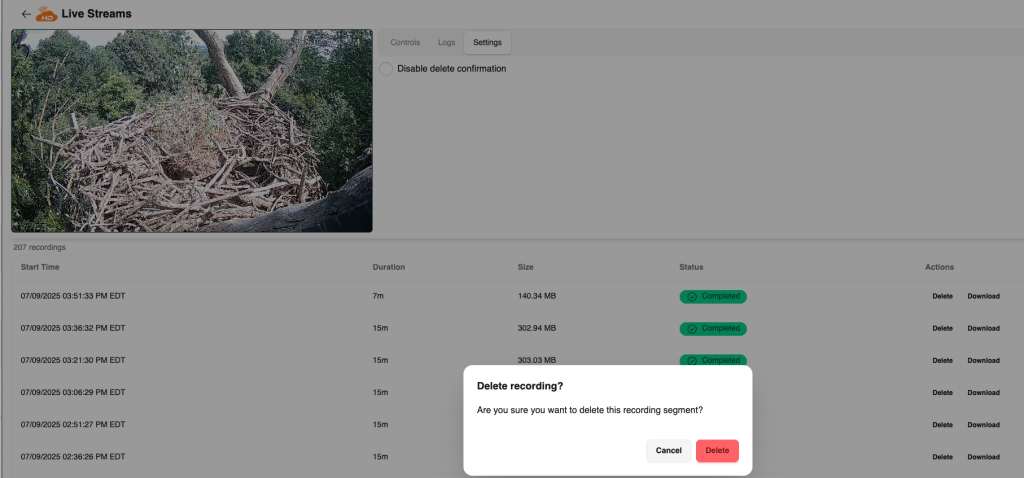
Settings Tab
The Settings tab includes:
Disable Delete Confirmation
Unchecked
You must confirm before deleting recordings.
Checked
Recordings are deleted immediately without confirmation.
Use this option carefully.
Managing Recordings
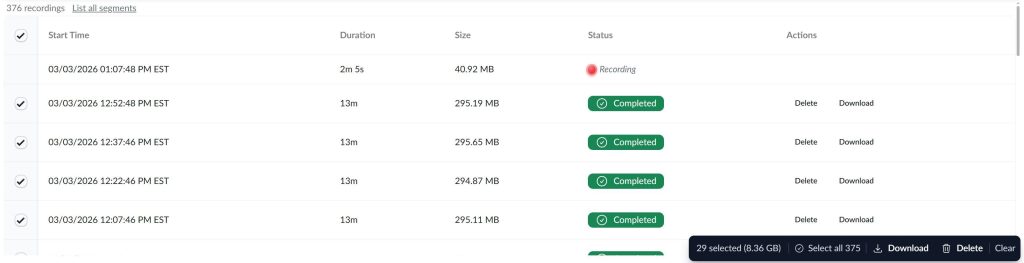
Managing Multiple Recordings
A checkbox appears on the left side of each recording.
You can:
• Select individual recordings
• Select multiple recordings
• Use the top checkbox to select all visible recordings
When selections are made, a bulk action toolbar appears at the bottom.
Managing Individual Recordings
Each completed recording includes two actions:
Download
Downloads the .mp4 file using your browser’s default download settings.
Delete
Permanently removes the recording.
Deleted recordings cannot be recovered.
Bulk Action Toolbar
The toolbar in the bottom right displays:
• Number of selected recordings
• Combined total file size
• Select all option
• Download
• Delete
• Clear
Bulk Download
Click Download to download all selected recordings.
Each file downloads individually using your browser settings.
Large selections may trigger multiple downloads.
Bulk Delete
Click Delete to permanently remove all selected recordings.
If delete confirmation is enabled, you will be prompted.
If disabled, deletion happens immediately.
Bulk deletions cannot be undone.
Clear Selection
Click Clear to deselect all recordings and hide the bulk toolbar.
Viewing a Completed Recording
Click a completed recording to open the playback viewer.
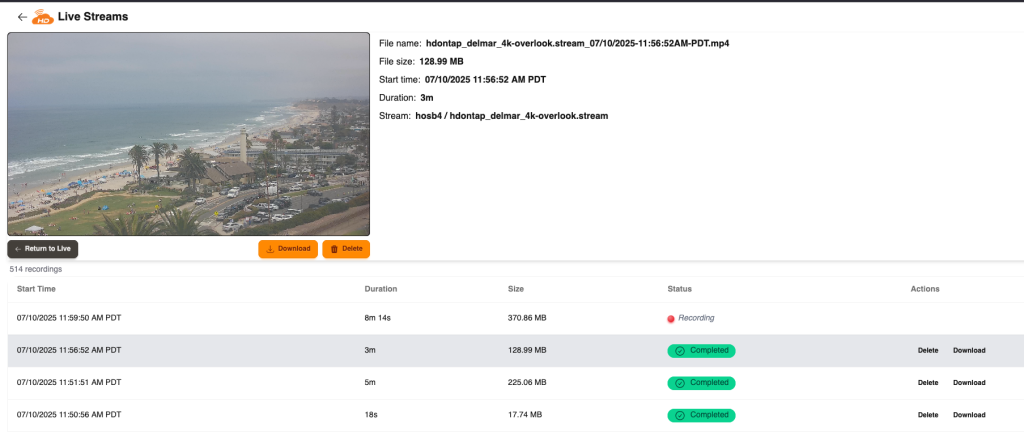
Playback View
The live stream preview is replaced with:
• Embedded video player
• Playback controls
• Return to Live button
Segment Information
Displayed alongside the video:
File Name
File Size
Start Time
Duration
Stream path
Actions While Viewing
Download
Saves the recording locally.
Delete
Removes the recording permanently.
Confirmation behavior depends on your Settings configuration.
We hope this guide helps you confidently navigate and use the HDOnTap Live Stream Recording System.
From live monitoring and segment management to storage control and bulk actions, the system is designed to give you flexibility and full control over your recorded content.
If you have any questions or need assistance configuring your recordings, please contact the HDOnTap support team. We are always happy to help.
Thank you again for choosing HDOnTap.